How to Turn a Bowl on a Pole Lathe
This article describes the process of turning a wooden bowl on a pole lathe. It is beautifully illustrated by photos from Neil White who visited me recently. This article is written for my potential customers who want to know a little more about the process behind how my bowls are made.
I’m sure it’ll also be of interest to existing woodturners, but is light on details in some areas. This was almost the first bowl I turned on my new lathe (based on the old designs), and at the time of these photos being taken I was still acclimatising to it. Some details of my process and the lathe have changed (and are still changing), and rest assured I’ll go into those details in a future blog post for the wider benefit of the woodturning community when it is better understood.
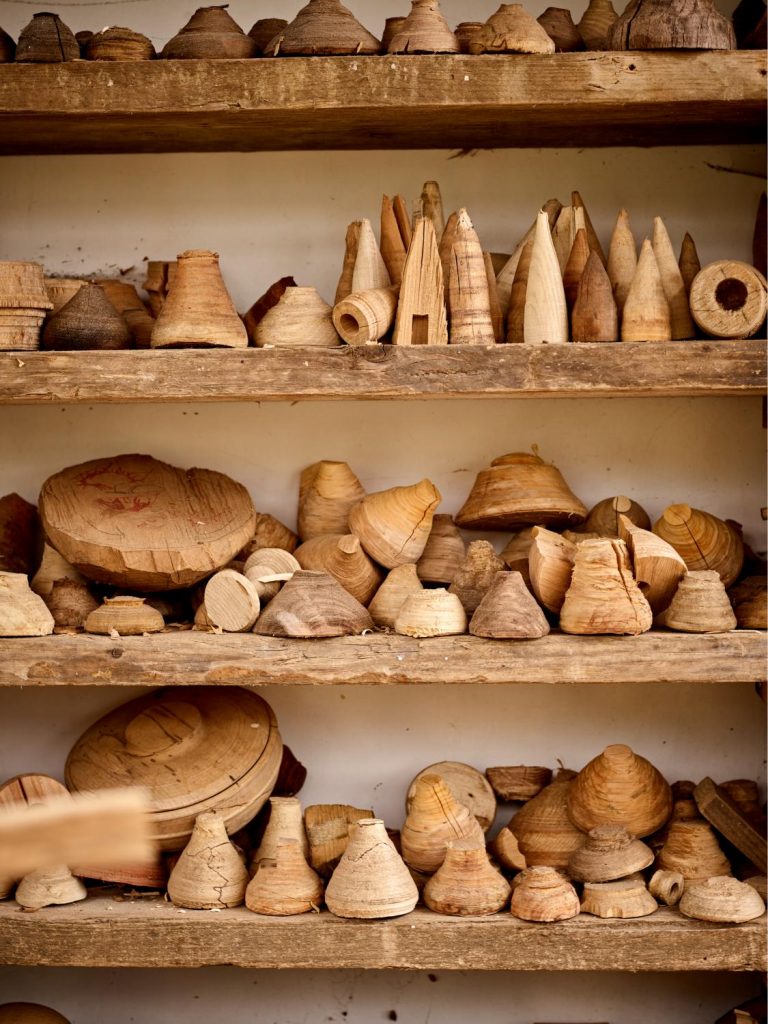
Currently all my bowls are turned in one go from green or mellowed timber, and are unsanded. To make one, the first job is to select a log from the woodpile. As I have gained experience I tend to be fussier over which wood I turn. These days alder, sycamore, beech and cherry are my go-to’s. I want to use straight-grained trunkwood which splits straight and with minimal knots.
To make the wood ready for the lathe, or make the ‘blank’, I begin by splitting the log in half using a froe or axe, and then flattening the front face of the bowl using the axe, allowing me to scribe a circle using a pair of dividers. A smaller circle is then scribed to help me position the mandrel later (‘the last bowlturner’: George Lailey called these “mampers”).
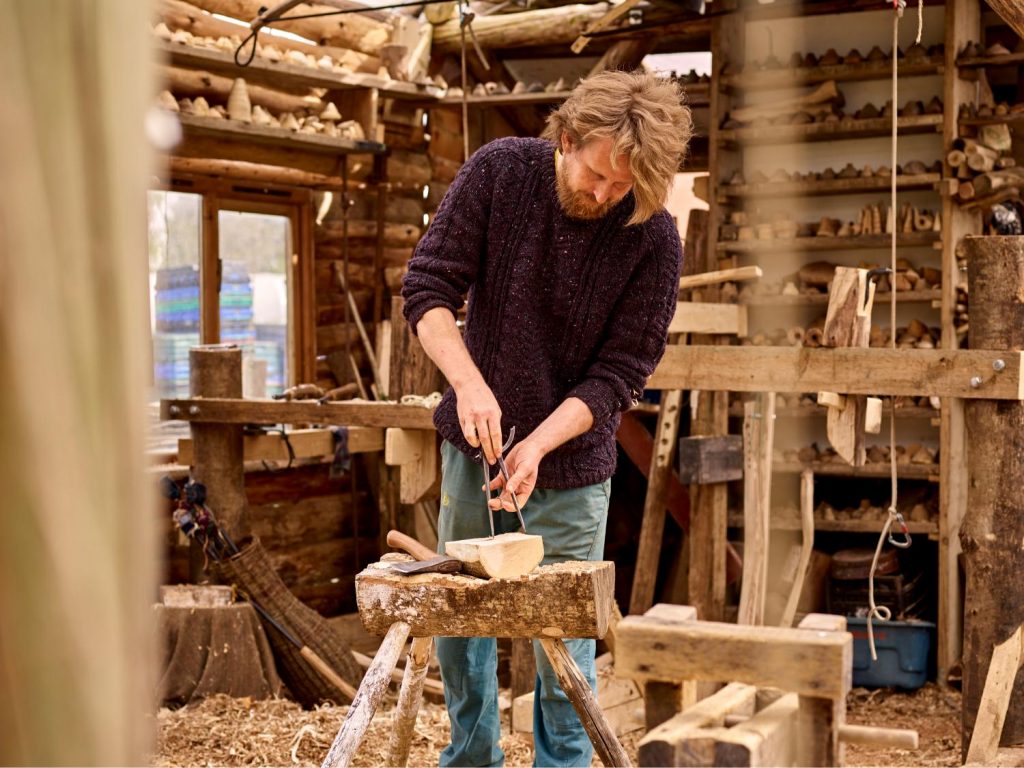
I now proceed to square the sides of the blank, and then remove a series of equal-sized flat surfaces, or facets, from the back of the bowl, until I have 8 equal sized faces. the ridges between these facets are then removed to make 16 facets and an approximate half sphere. The corners are then axed off, followed by a quick glance for any high spots, and it is ready to be mounted on the lathe.
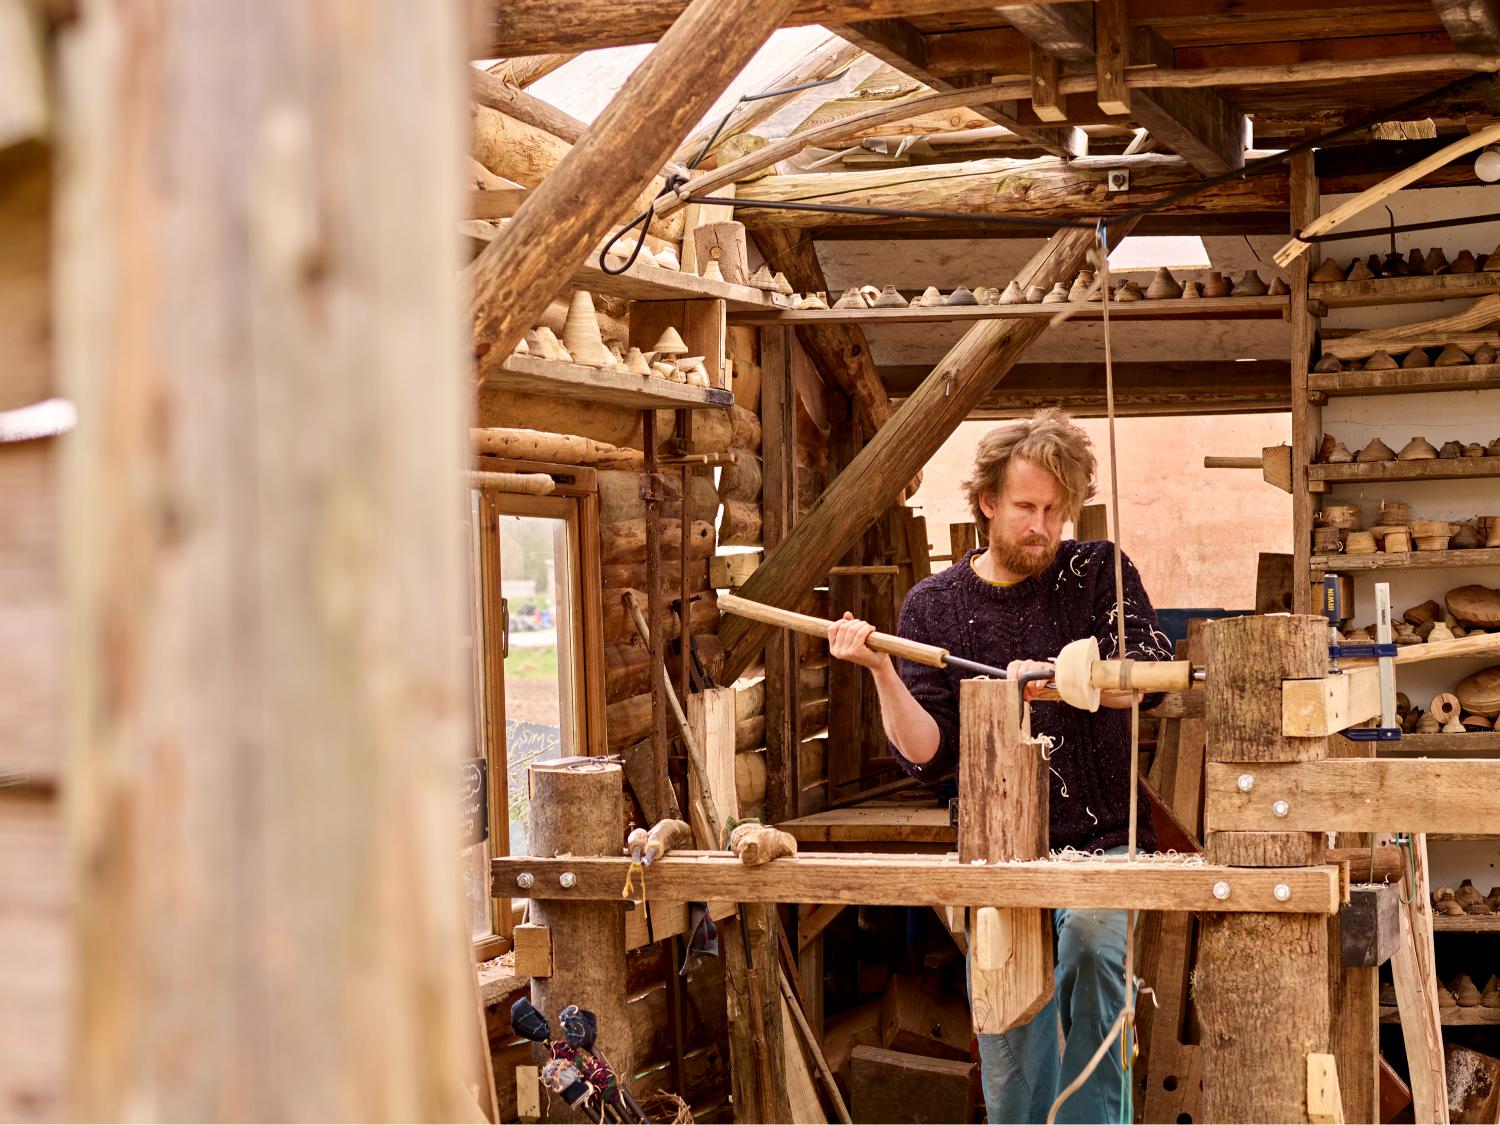
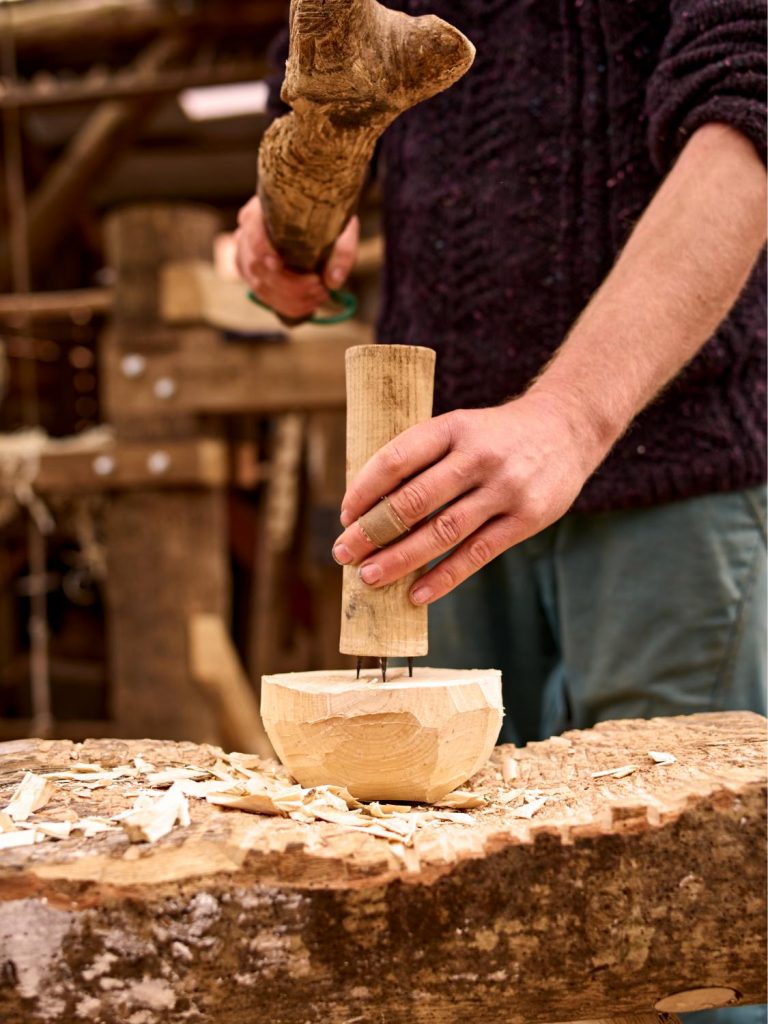
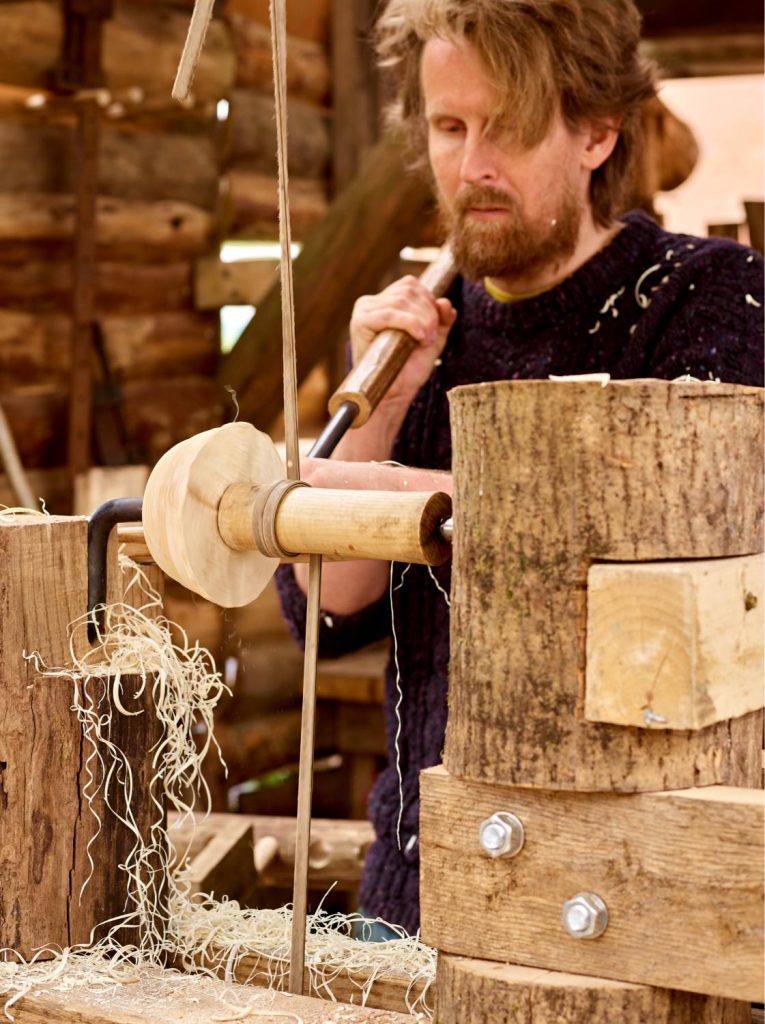
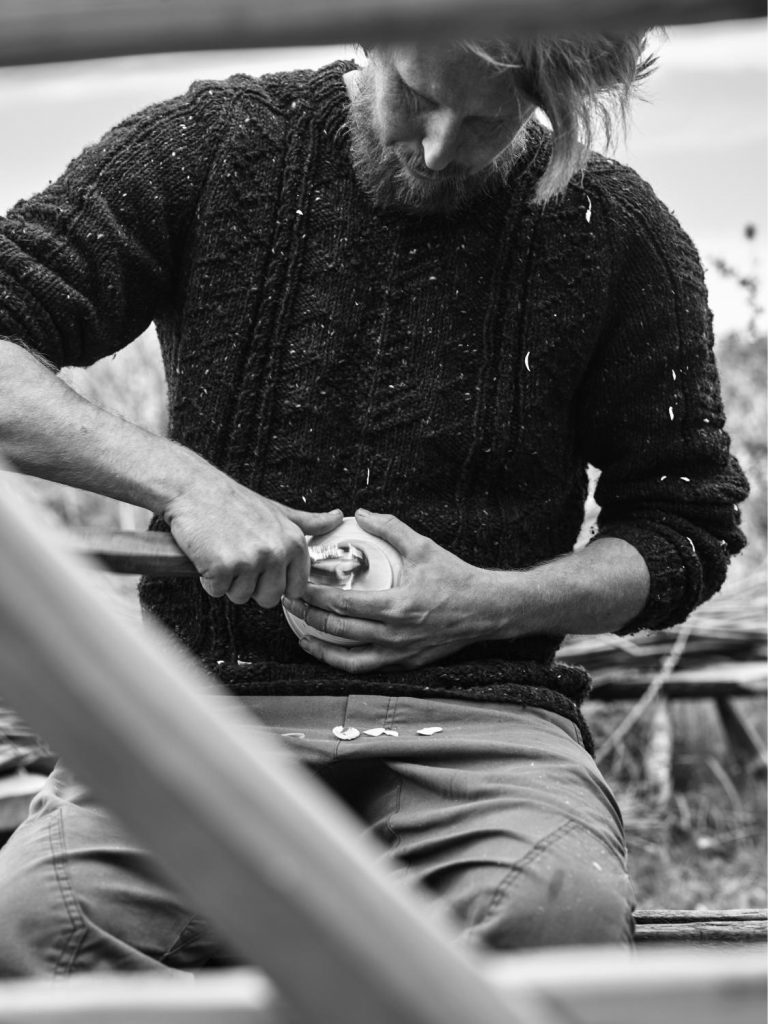
Now the mandrel is hammered home centrally in the face of the blank. This is a wooden cylinder with three shaped metal spikes in it. This is required for the drivecord (in my case a leather strap) to be wrapped around. It is important that the mandrel is perpendicular to the front face surface to ensure the bowl is balanced properly on the lathe to save extra legwork later.
Now the bowl is taken to the lathe and the mandrel mounted between the two centres so that it spins level. At this point the back of the tailstock (or “poppet”) is struck with a mallet to clearly define the centre in the back of the bowl, and a wedge hit to keep the poppet in place.
The leather strap is now wrapped around the mandrel in the correct direction (we want the bowl to move towards us when pressing down with the foot) and without twists before being attached to the pole or bungee above.
At this point it is worth describing how the pole lathe works. As already mentioned, the bowl is mounted between centres and a cord wrapped round it. Below the lathe a foot pedal allows the turner to spin the work towards them allowing a cut to be taken. Meanwhile, above the lathe a reciprocating springy mechanism exists (usually a simple pole or a piece of bungee), which when the pedal is released, will return the bowl to its original position.
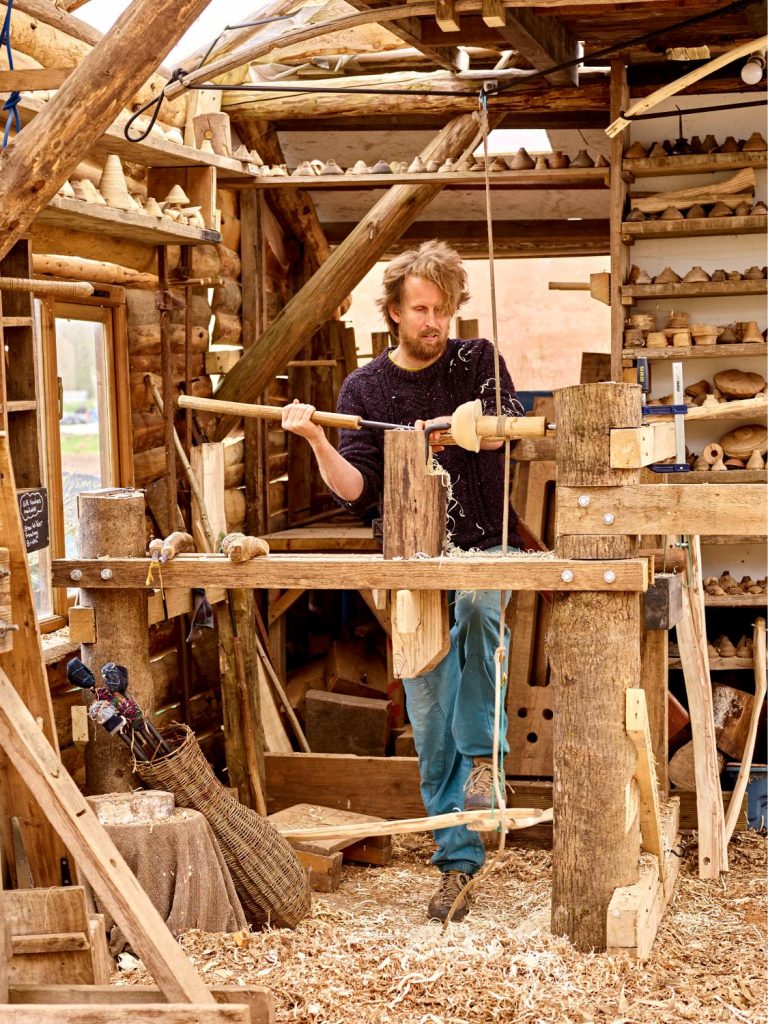
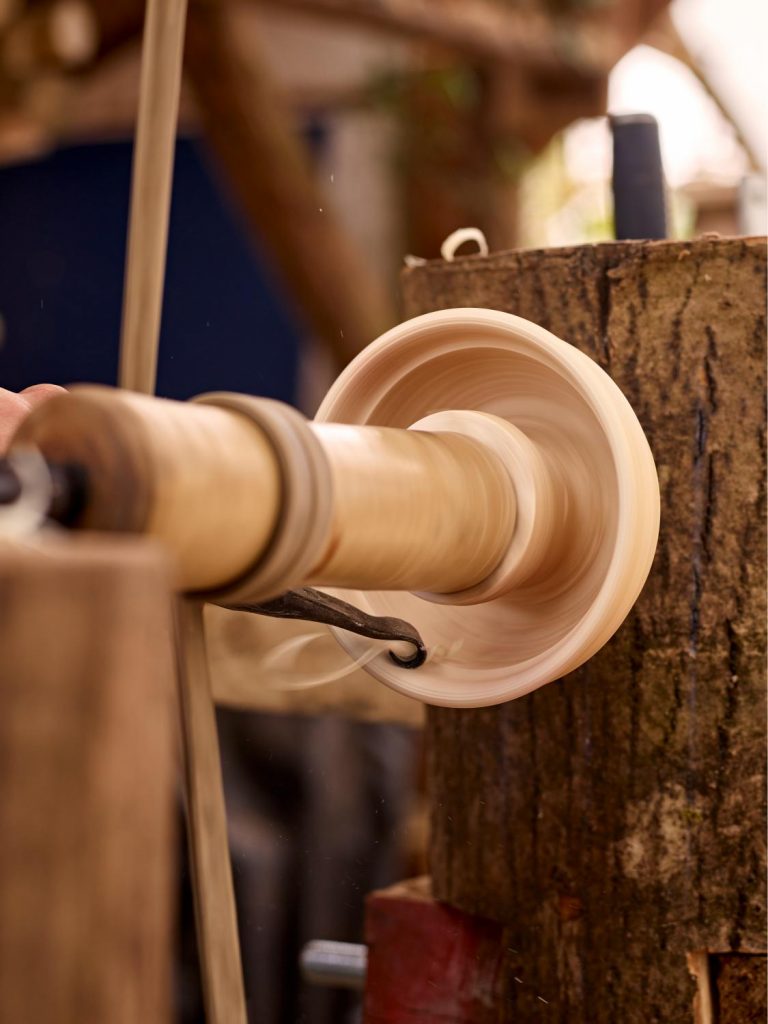
Using a roughing tool (some call this a “tip-up” tool) I establish the shape of the exterior surface of the bowl and turn a small slightly concave foot (so that it will sit level once dry). In an ideal world I achieve a totally round surface in one pass and can then slow the lathe speed down (by pressing my foot slower) for a finishing cut. In reality it may take me 2 or 3 passes before I achieve round, it all depends on how well I axe out the blank. Usually I sharpen the hook before making the finishing cut. My sharpening process always feels fluid, but currently I have a vice mounted on my lathe and a small chainsaw file for the inside of the hook and a 300 grit diamond stone for the flat back surface.
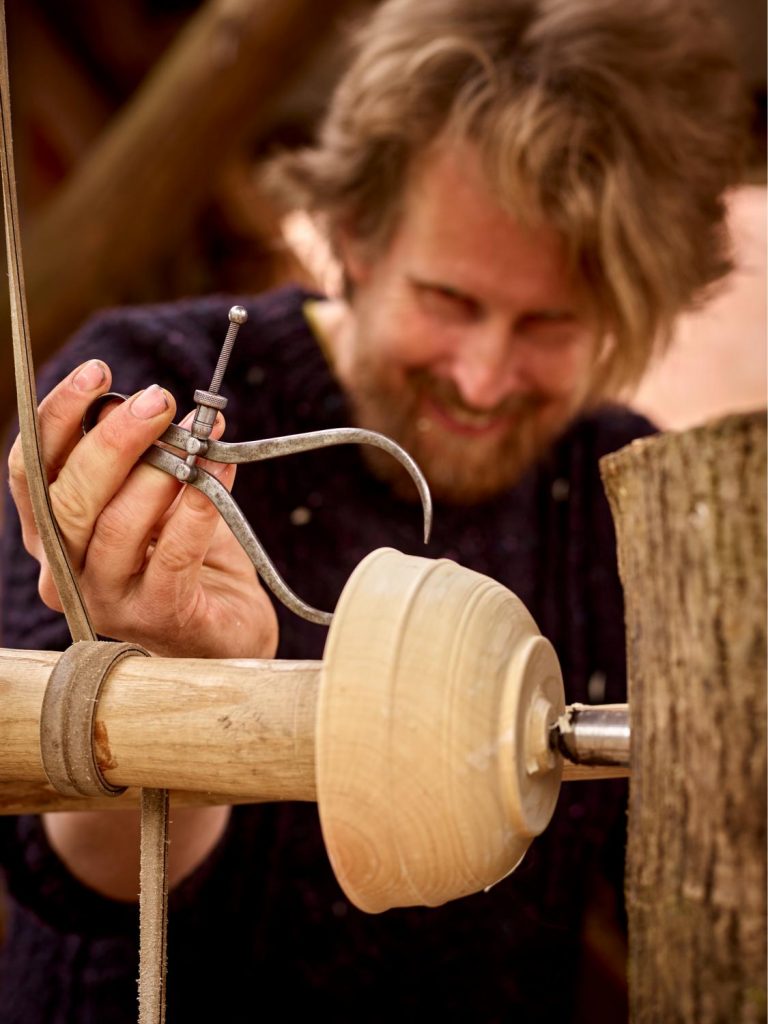
The bowl is then turned round on the lathe and the inside hollowed. For bowls bigger than 6” I will always try and make a second bowl from the core of the first and I’ll describe this process here. A small groove is made with the roughing hook, about twice the width of my hollowing hook, and I then switch to this tool (also called a tip-down). I make a groove the width of the hook with the bevel resting on the core and then open that cut up to about 1.5times the width of the tool, leaving the inside surface to be finished at a later point. I continue like this down the bowl until I nearly reach depth slightly narrowing the core towards the base of the bowl. I then do a finishing pass around the rim and down the inside of the bowl. I check for thickness using calipers regularly from this point onwards, looking for an even wall thickness with perhaps a slightly thicker rim (for strength).
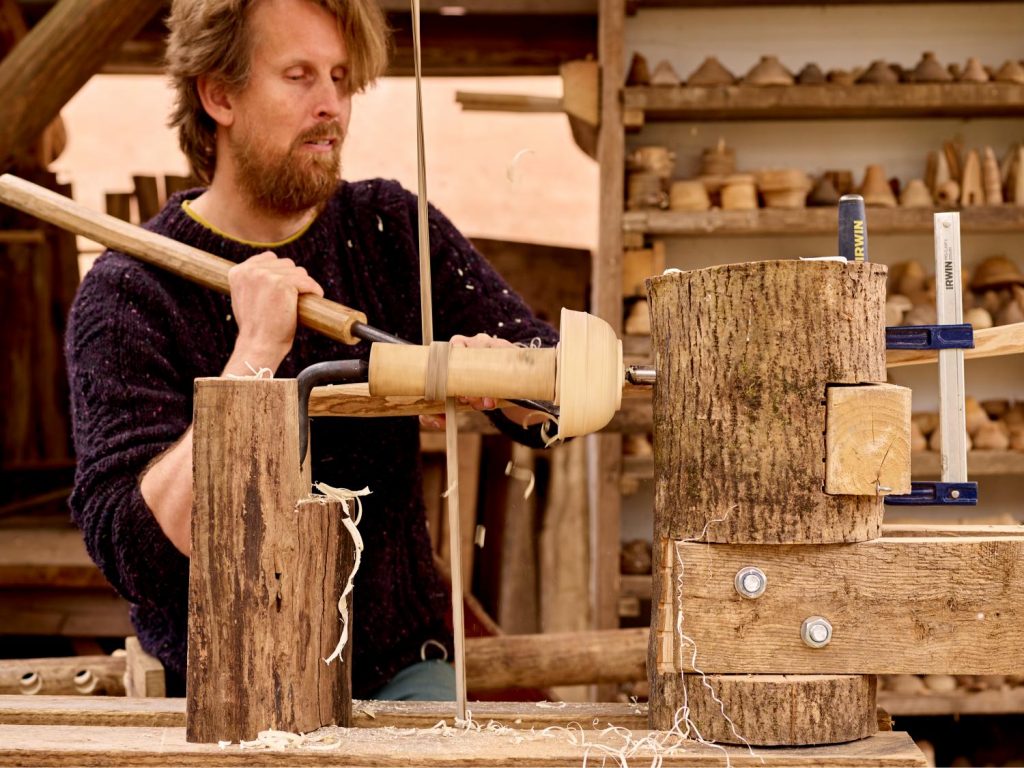
At this point I pick up the first nesting hook and proceed to cut into the core in a similar manner as with the hollowing tool. Cutting the core first of all and then twisting the tool leftwards slightly to open up the cut, before repeating. The same tool can then take a finishing pass across the bottom of the bowl. For bigger diameter bowls a series of nesting hooks with different curves is required and an acute awareness of where you are removing, and how much, material, as you are cutting blind at this point. Once the core is thin enough the bowl can be snapped off.
The remaining stubs top and bottom can then be cleaned up using a spoon knife, adze or gouge to leave the distinctive tool marks found in the base of a pole lathe turned bowl.
All that remains is to repeat the process with the core to make a smaller bowl. For this I sometimes remove the original mandrel and replace with one a smaller diameter so as to improve the gearing.
Thanks for reading, I’d love to hear your thoughts if you have any, so please comment below!
Neil White’s website is here, and instagram here for anyone who wants to see more of his work or get in touch.
If you want to subscribe to stay up to date, please fill in the form below and check your spam email to verify your email address. Thanks!